Today, I am excited to share a delightful Indian dish that’s perfect for vegetarians and packed with flavor. Let’s get cooking with our Green Gram Dhal Adai and Onion Chutney.
This recipe is not only delicious but it’s healthy too. Made with protein-rich green gram and minimal oil, the adai is a great source of essential nutrients. The accompanying onion chutney adds a burst of flavor while also providing antioxidants and vitamins.
Why I like this recipe
I personally like this recipe for the many nutrients it has to offer. As a mindful dieter myself, I felt this recipe should be treasured and shared to benefit my readers too. Once in a while, making this type of adai has extreme benefits for health and should be given to the elderly and kids too. The balance of protein, fiber, and essential vitamins makes it a comprehensive meal that supports overall well-being.
Benefits of Green Gram
Green gram, commonly known as mung beans, is a powerhouse of nutrients with numerous health benefits. Rich in protein, fiber, and antioxidants, green gram is particularly beneficial for those looking to increase their protein intake or lose weight. The high protein content helps in muscle building and repair, making it an excellent addition to vegetarian and vegan diets. Moreover, the dietary fiber found in green gram aids digestion and promotes a feeling of fullness, which can help in managing hunger and reducing overall calorie intake. When consumed as part of a balanced diet, green gram supports weight loss and contributes to overall health.
Benefits of Using Banana Leaves in This Recipe
Using banana leaves for this recipe not only holds the fragrance that this recipe needs, but also helps to retain the softness while cooking this adai. Since the cooking time for green gram adai is much longer than that of regular adai, the banana leaf prevents the adai from becoming dry or even burning on the outside while remaining undercooked inside. The leaves help to retain the heat necessary for evenly cooking the adai, ensuring a well-cooked and flavorful dish.
Therefore, please do not omit the banana leaf for this recipe. It is a must to achieve the desired texture, authenticity and flavor of the dish. Skipping this step could compromise both the taste and texture of the final product, making the use of banana leaves indispensable.
Tips on How to Achieve the Perfect Adai
- Grind Coarsely: When grinding the green gram, make sure to grind it coarsely with a few pulses only. Avoid grinding it smoothly, as this will result in a very hard adai. The coarse texture is essential for achieving the right consistency and ensuring that the adai remains soft and flavorful when cooked.
- Drain Thoroughly: Before grinding the green gram, make sure to drain the soaked water completely. Excess water can result in a smoother batter, which is not ideal for this recipe. Once drained, proceed to grind the green gram coarsely without adding any additional water.
- Patience with Flipping: You may flip the adai after about 5 minutes of cooking on the griddle. Flipping it too early may result in an undercooked adai that falls apart from its shape. Additionally, flipping prematurely can cause the adai to tear and stick to the banana leaf. Allow sufficient time for one side to cook properly before flipping to ensure a well-cooked, intact adai.
- Adjust the Spice: I am using Indian green chili, which is known for its spiciness. However, this recipe is mildly spicy, providing a balanced flavor without overwhelming heat. If you prefer a spicier adai, you can go ahead and add maybe another 2 green chilies to the batter during the grinding process. This will enhance the heat factor, making the adai more suitable for those spicy lovers.
- Choosing the Right Chutney: As this recipe is mildly flavoured with an earthy taste, I prefer the combo of onion chutney for its tanginess and spiciness. Another chutney which goes along well with this recipe is coconut chutney for those who wish to have a subtle sweetness taste.
Conclusion
We hope you enjoy making and savoring this delicious Green Gram Dhal Adai with Onion Chutney. For more mouthwatering recipes and cooking tips, be sure to subscribe to our blog.
Happy cooking!

Green Gram Adai & Onion Chutney
Description
Green gram adai with onion chutney is a delightful South Indian dish that combines nutritious ingredients with bold flavors. The adai, made from a mixture of ground green gram, potatoes, peas, and aromatic spices, is cooked to perfection between lightly oiled banana leaves, which impart a unique and subtle earthy aroma. The accompanying onion chutney, a blend of sautéed onions, red chillies, garlic, coconut, and tamarind, is finished with a tempering of mustard seeds, curry leaves, and asafetida. The result is a vibrant and tangy chutney that perfectly complements the hearty green gram adai, making this dish a wholesome and flavorful treat.
Ingredients for the Green Gram Adai & Onion Chutney
Ingredients for the Green Gram Adai
Ingredients for Onion Chutney
Instructions on how to make the Green Gram Adai
Instructions on how to make the Onion Chutney
Instructions on how to make the Green Gram Adai & Onion Chutney
Instructions on how to make the Green Gram Adai with step-by-step photos
-
Prep the Green Grams:
Rinse the soaked green gram three times to remove any residue.
In a mixer jar, add the soaked green grams, ginger, green chillies, and salt. Grind coarsely with a few pulses. Set this mixture aside.

-
Cook the Potatoes:
In a pot of boiling water, add the chopped potatoes and boil for 10-12 minutes.
Once cooked, cool slightly, then peel and mash the potatoes while still warm using a masher.
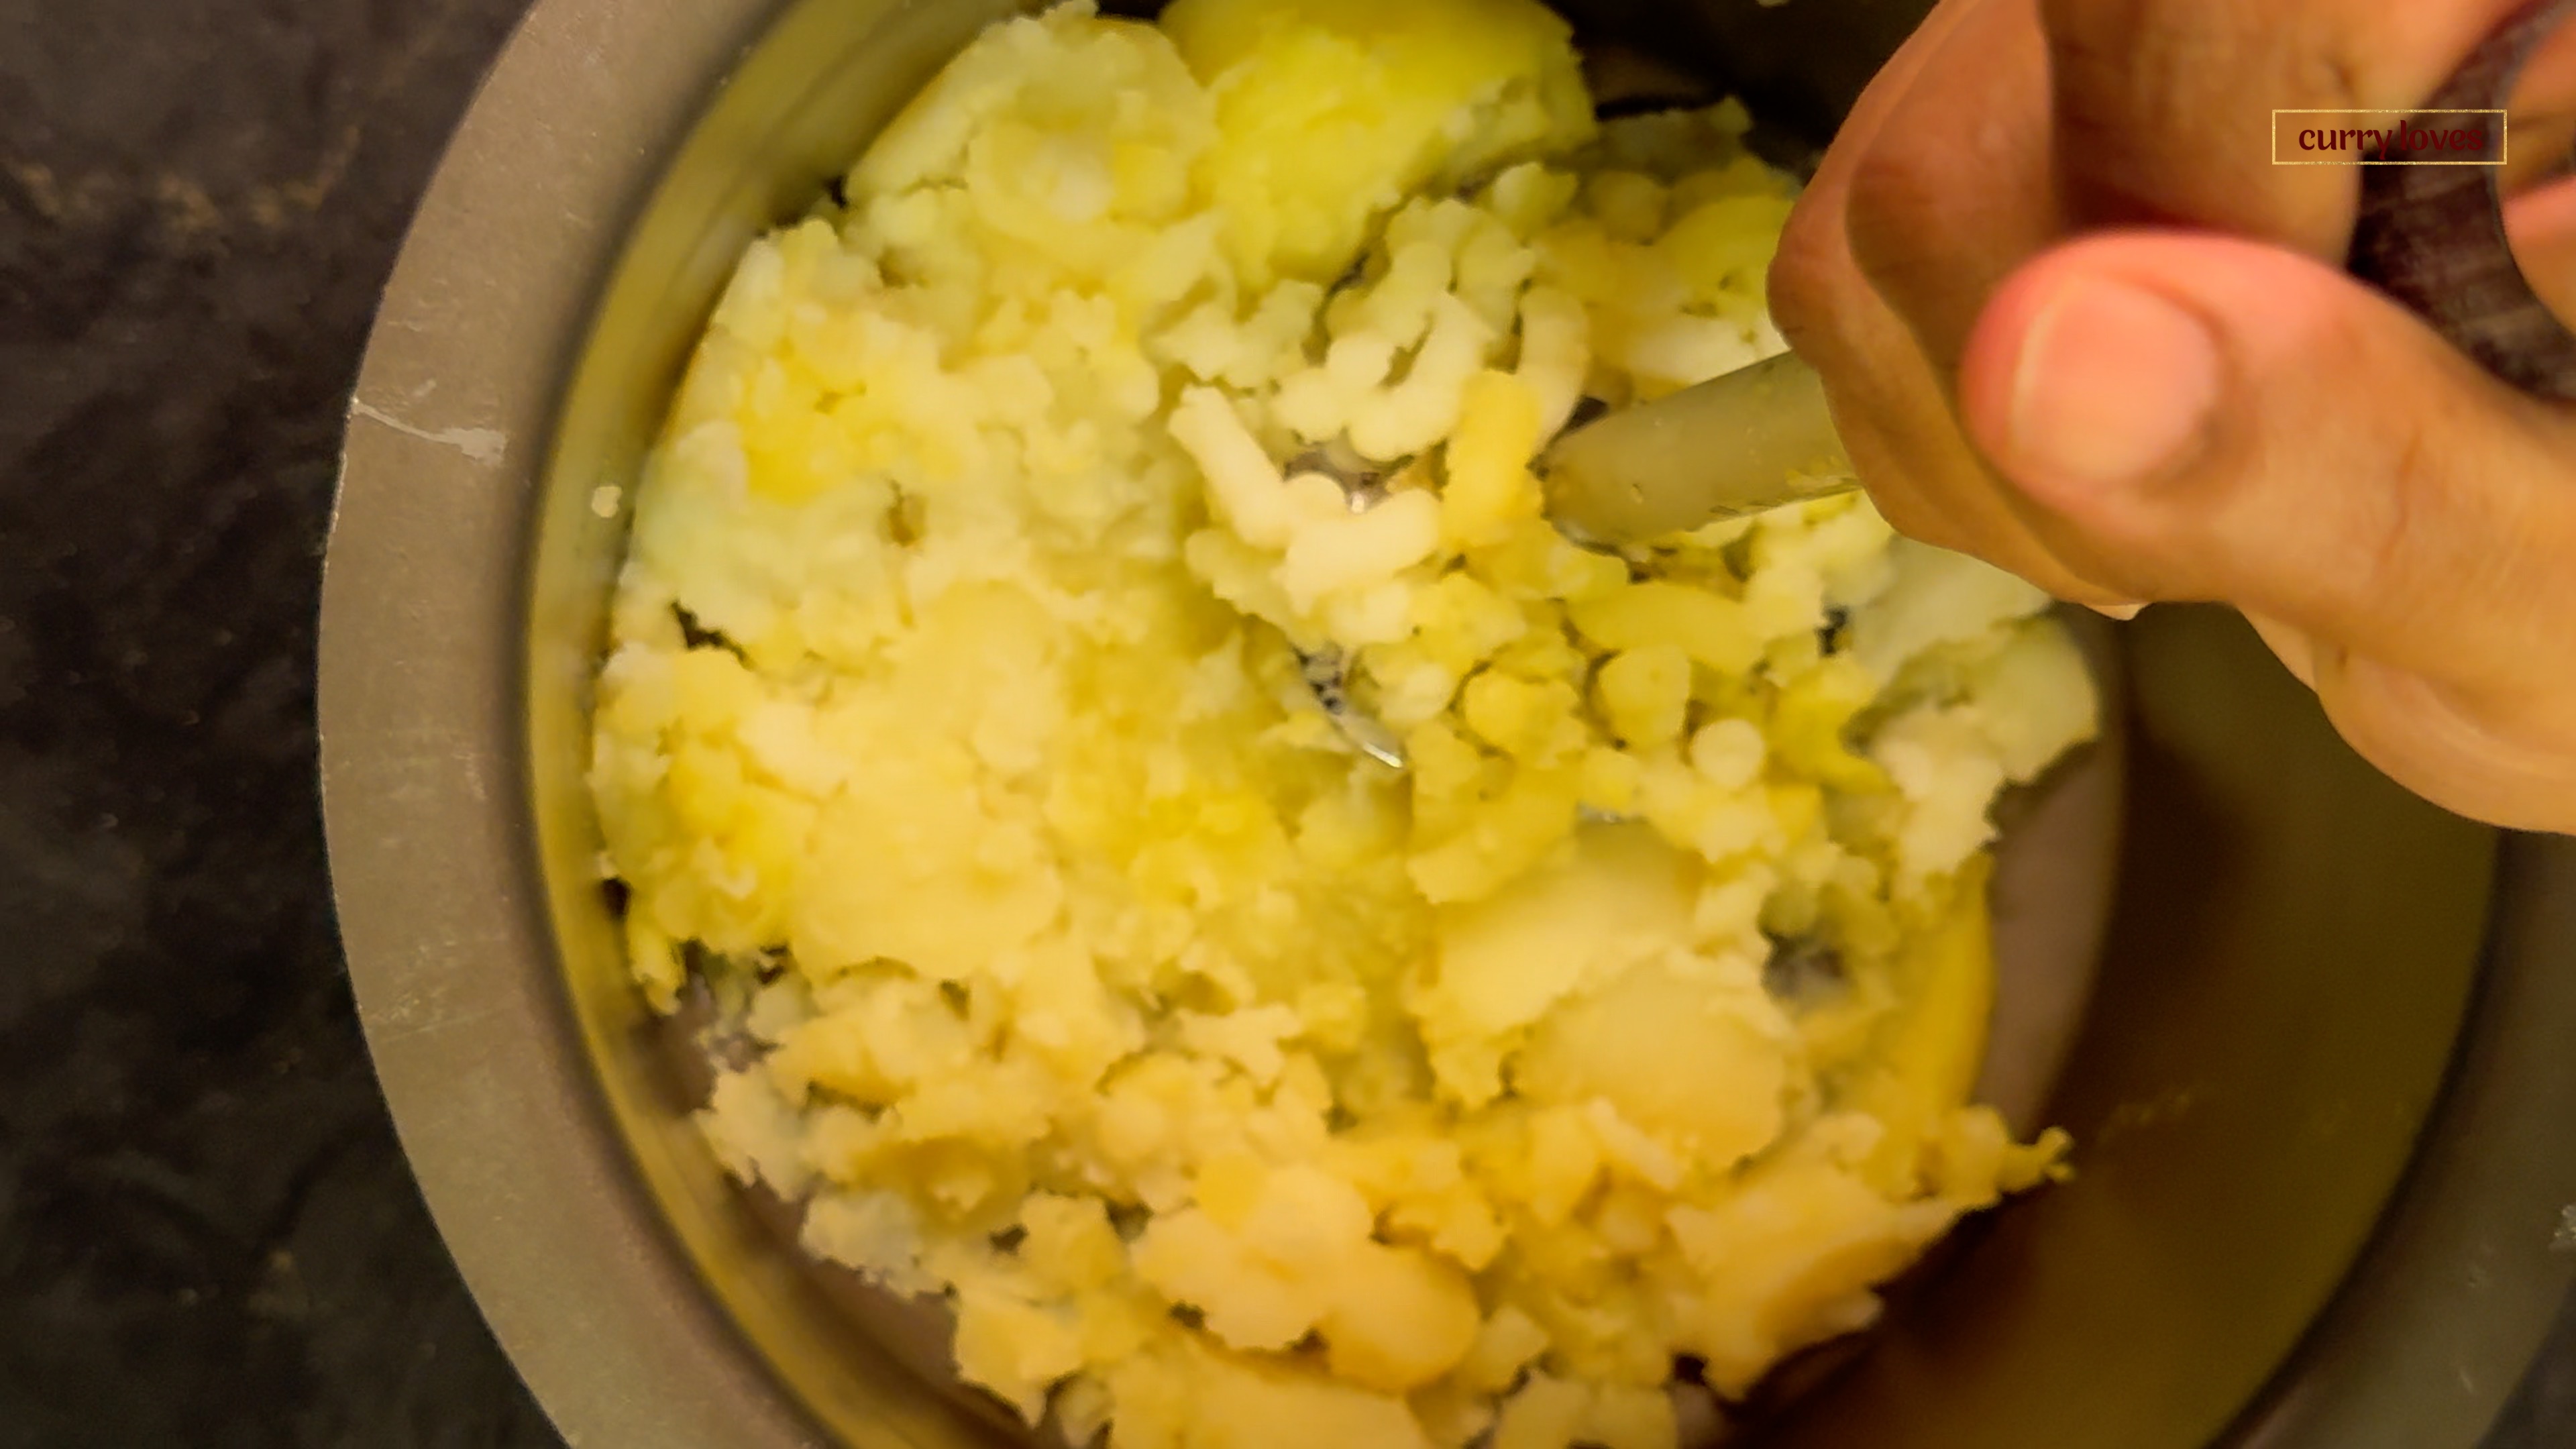
-
Add the Peas:
To the mashed potatoes, add the peas and slightly mash them together. Set aside.

-
Fry the Onions:
In a pan, heat 1 tbsp of oil and fry the sliced onions until light golden brown, about 3 minutes.

-
Combine Ingredients:
Add the coarsely ground green gram mixture, mashed potatoes and peas, fried onions, sugar, baking soda, chopped coriander leaves, and 1 tbsp of oil. Mix thoroughly to combine.

-
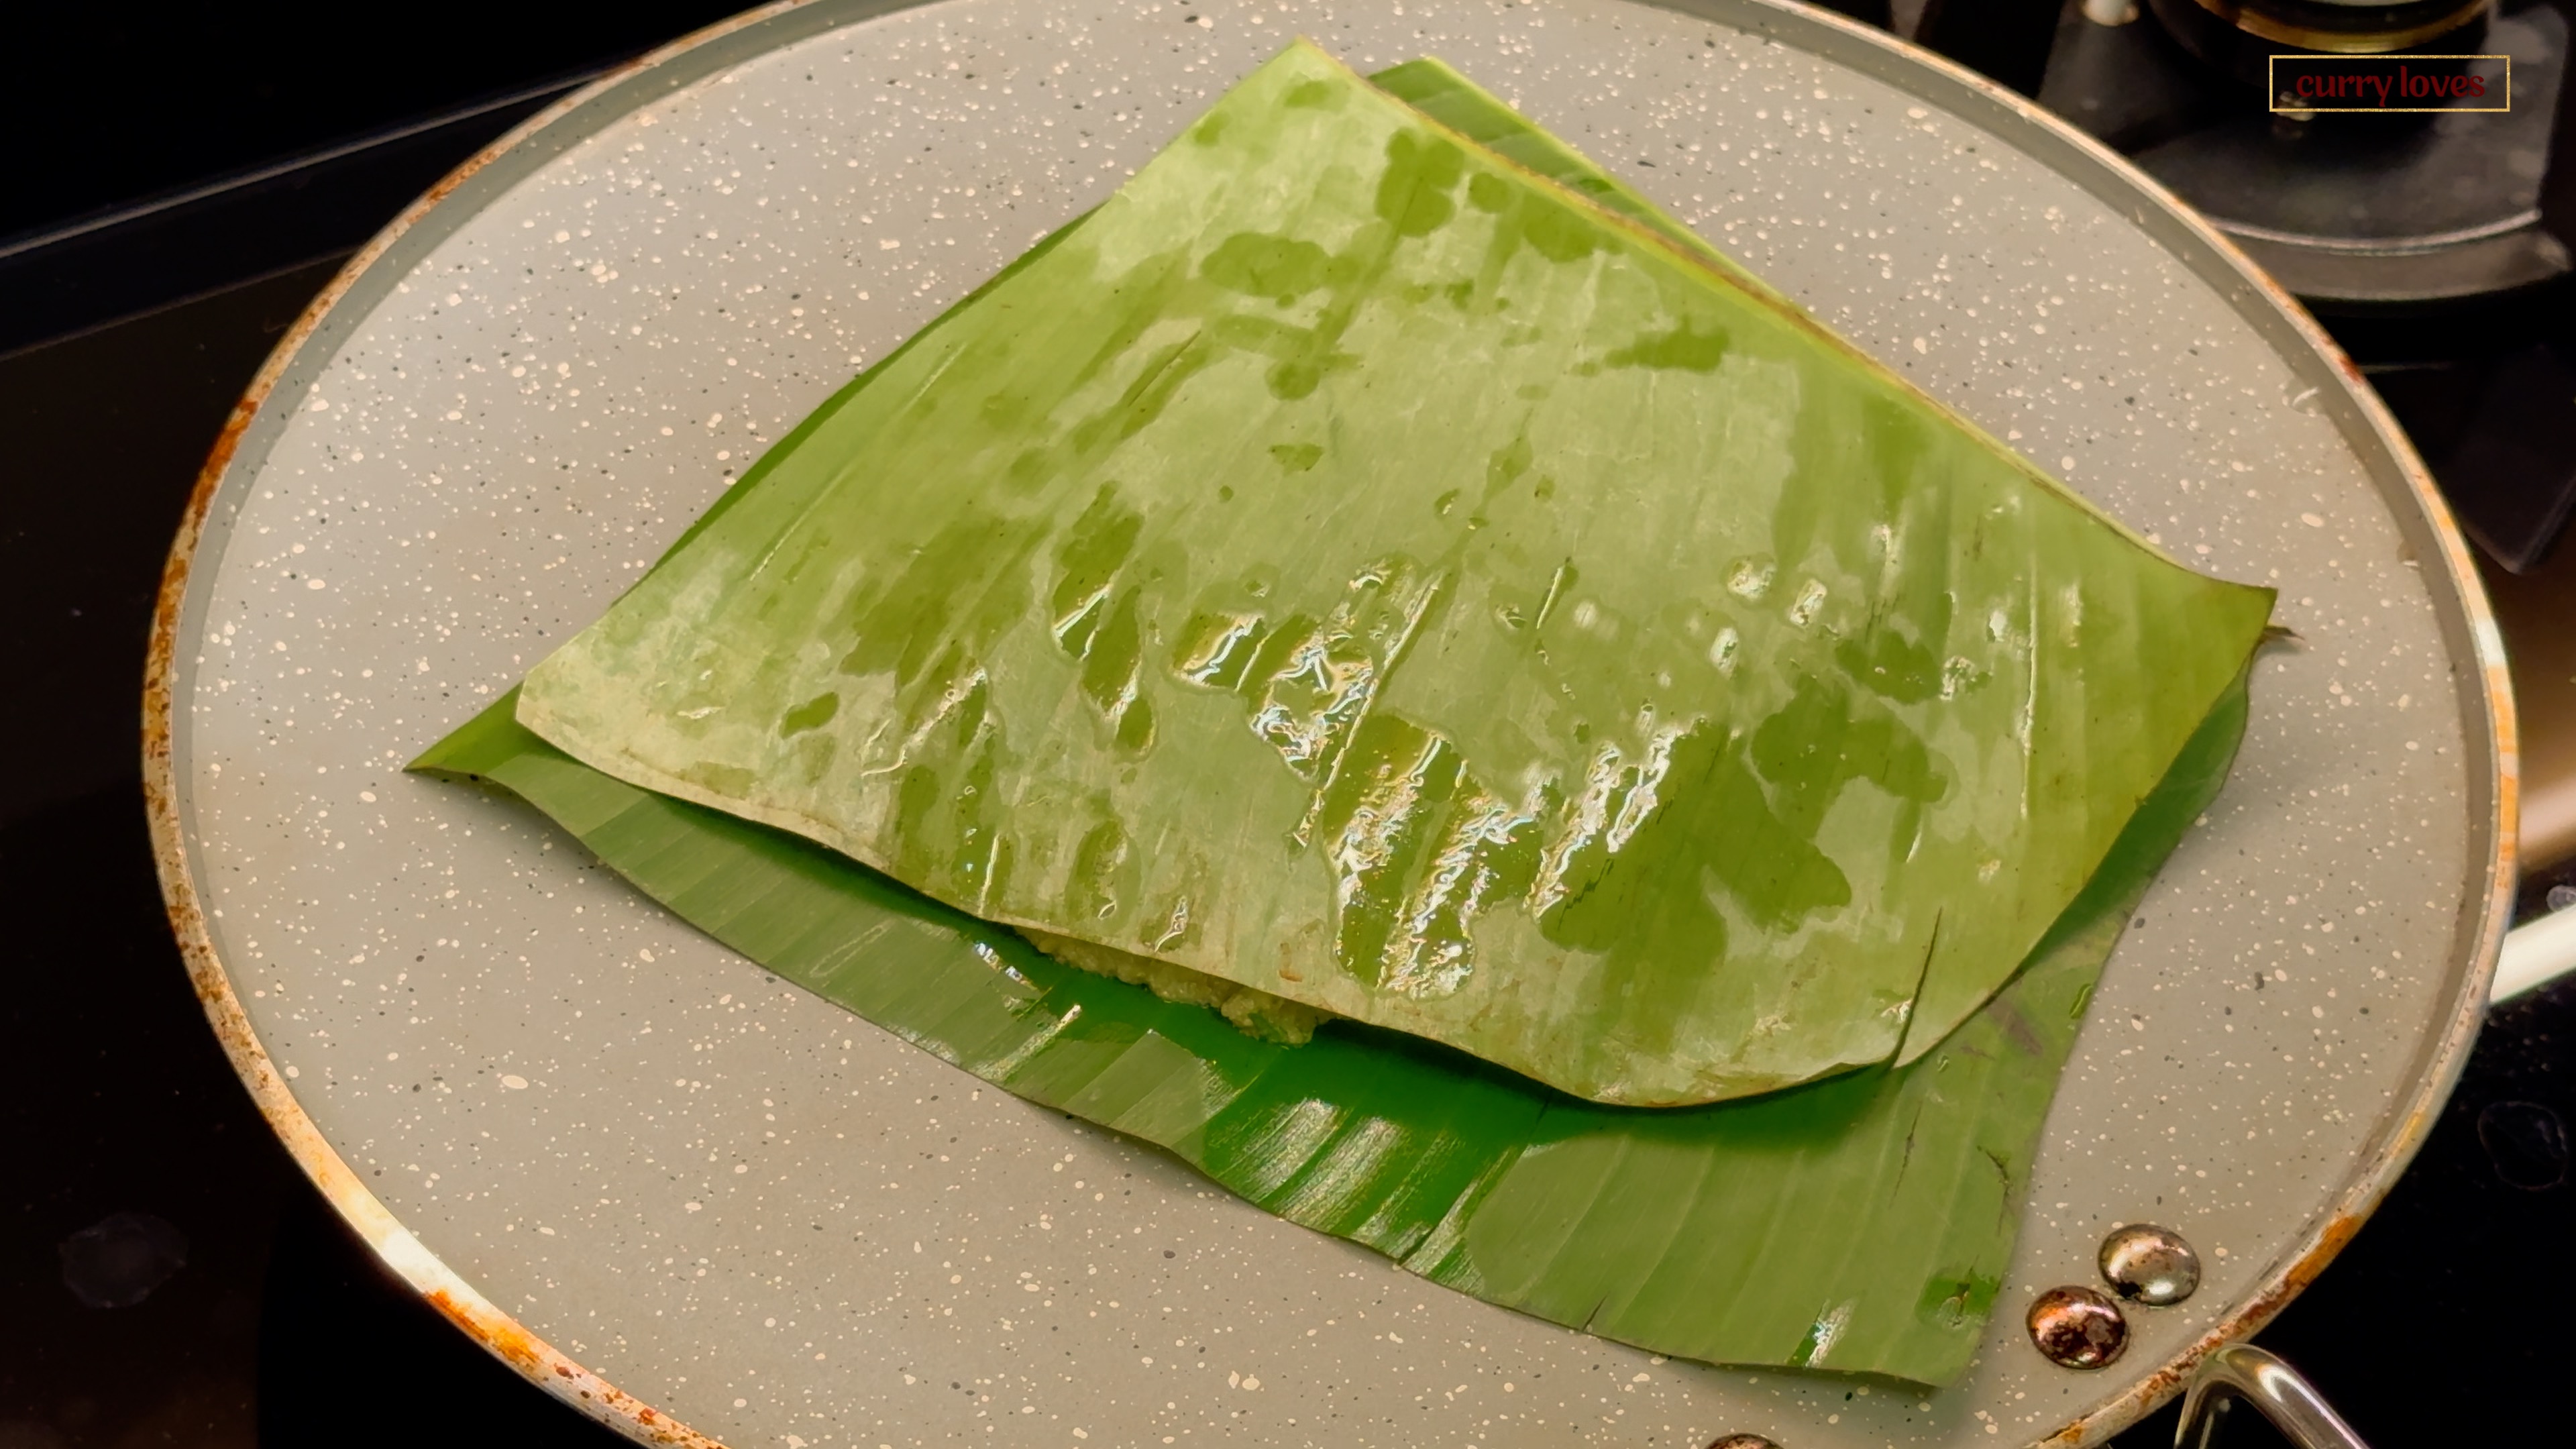
Prepare the Banana Leaves:
Cut the banana leaves into approximately 15 cm x 15 cm squares. Apply oil on one side of each leaf.
Cut the banana leaves into approximately 15 cm x 15 cm squares. Apply oil on one side of each leaf.
Place a handful of the adai batter onto the oiled side of a banana leaf, forming a slightly thick, round shape.
Cover the adai with another oiled banana leaf, oil side down.

-
Cook the Adai:
On a hot griddle over very low flame, place the adai covered with banana leaves.
Cook for 10-12 minutes on each side. Remove the banana leaf and serve the adai hot with onion chutney.
Instructions on how to make the Onion Chutney with step-by-step photos
-
Prep the Tamarind:
Soak the gooseberry-sized tamarind in water for at least 20 minutes.

-
Sauté the Ingredients:
In a pan, heat 1 tbsp of oil.
Add the dried red chillies and cubed onions, sautéing for about 2 minutes over medium flame.
Add the chopped garlic and sauté for another 3 minutes. Remove from heat and cool.

-
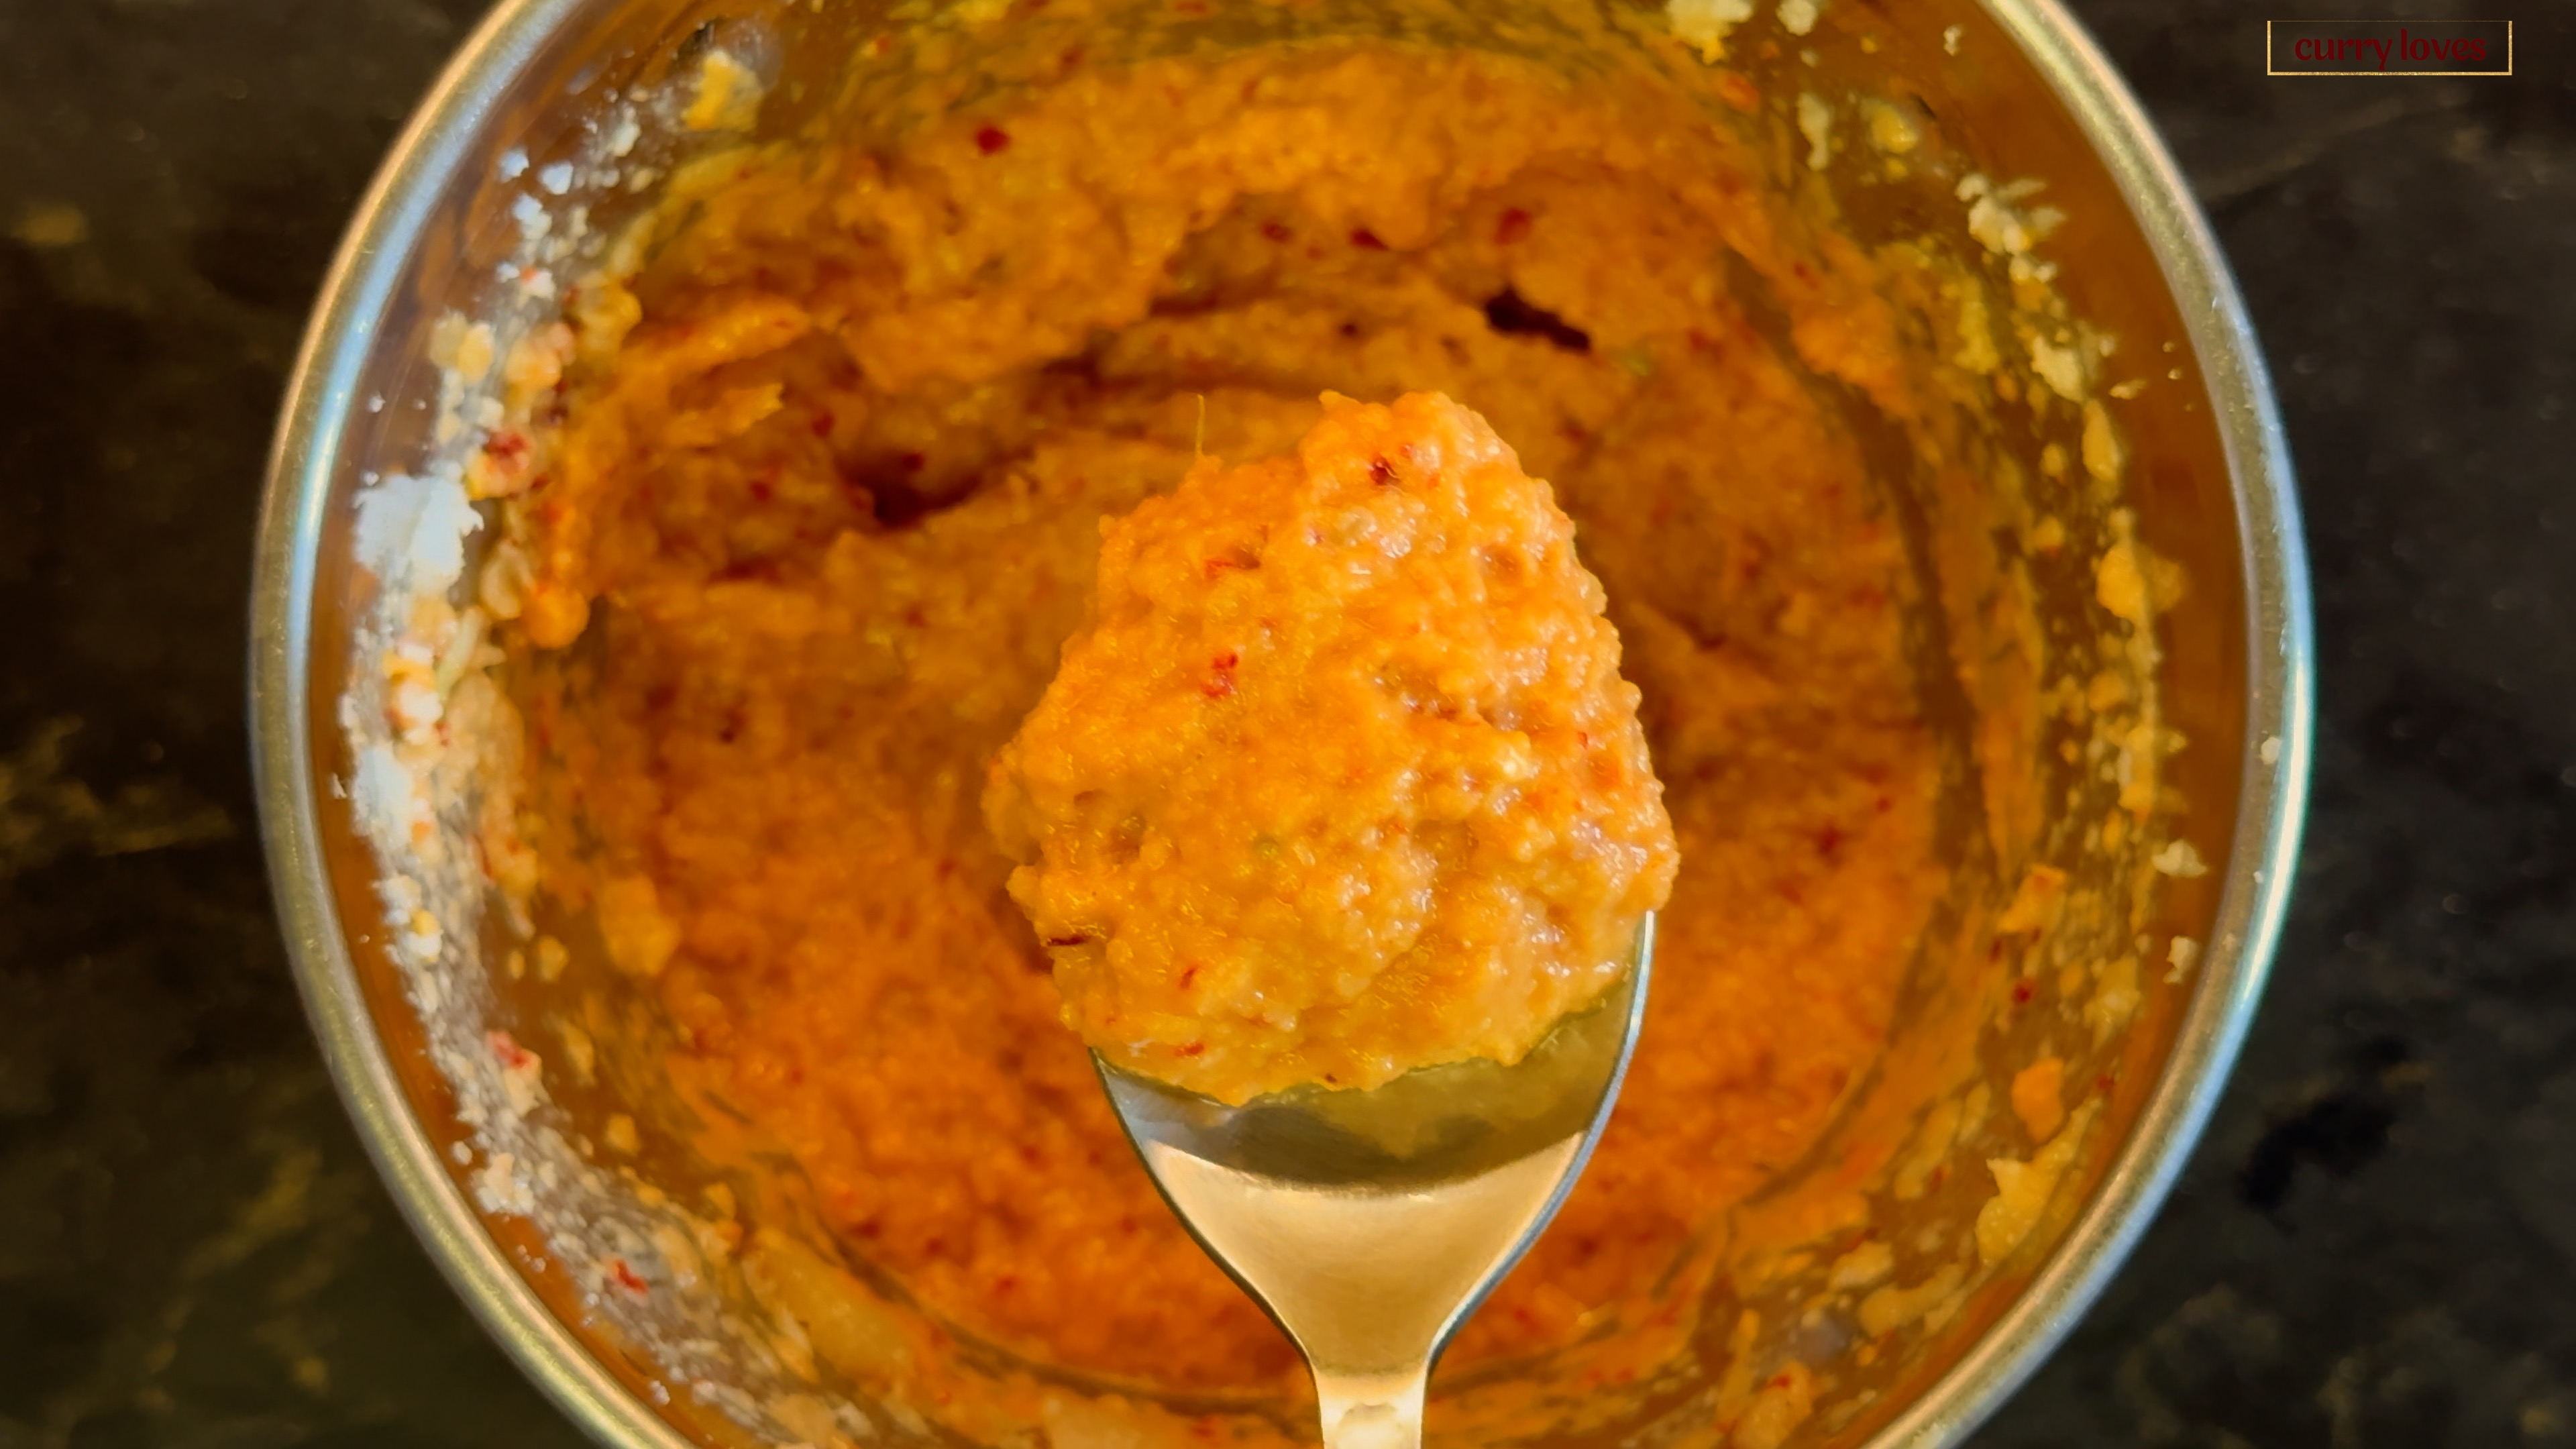
Grind the Mixture:
Transfer the cooled mixture to a mixer jar.
Add the grated coconut, soaked tamarind with water, and salt. Grind coarsely.
Transfer the chutney to a serving bowl.
-
Temper the Chutney:
n a small pan, heat 1 tbsp of gingelly oil.
Add the mustard seeds, asafetida, and curry leaves. Allow the mustard seeds to crackle.
Pour the tempered mixture over the chutney and serve with the green gram adai.


